The Camellia Club of Mobile
Club History
Meeting Schedule 2011-2012
Regional Events
Resources
Where to Buy the Best Camellias
Newsletters
Camellia Culture
Join Us
Links
Growing Camellias
in the Mobile Bay area
by the Camellia Club of Mobile
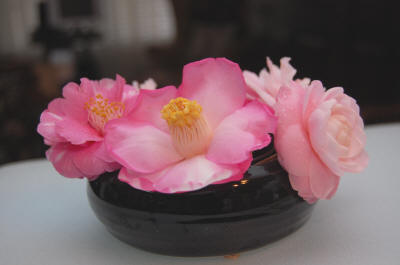
The camellia is the queen of the classic
southern garden -- a gracious hostess year ‘round while saving her own
spectacular show for fall and winter when she reigns supreme.
And for forty years, since the camellia was proclaimed Alabama’s
official “state flower,” owning one has become almost a patriotic duty,
especially in Mobile and its surroundings where for decades social
traditions like the Camellia Ball have been timed to coincide with its
spectacular bloom. Snow birds from
the north comment that they have never seen such a winter-blooming shrub,
and yet for generations camellias have added not only color and class to our
winter gardens, but warmth and beauty to our homes and parties during the
chilliest days of the year. It is
indeed a wonderful thing to possess something few others can have, and for
us, we have camellias!
Whether you are planting a camellia for the
first time, or caring for a long established camellia garden, these basic
instructions will help you grow them better and maintain them in beautiful
condition for many years. Of course
there are many ways to enjoy camellias besides admiring them in bloom, and
the Camellia Club of Mobile (formerly the Men’s Camellia Club of
Mobile, founded in 1940) invites you to experience the fun and enjoyment of
camellias at our monthly meetings.
For more information visit our website at www.mobilecamellia.org.
The starting point
There are many important factors in growing
camellias, such as watering, mulching, fertilizing, pruning and insect
control. But by far the most
important factor in growing a beautiful camellia is proper planting.
There is an old saying among camellia growers, “Never put a fifty
dollar plant in a five dollar hole!” Many people are unaware there is a
certain way to plant a camellia, but good planting actually has more to do
with successful growth and production of good plants and beautiful blooms
than any other factor. If properly
planted, a camellia can withstand some neglect and still grow for
generations, but it cannot withstand improper planting.
When to plant
Camellias can really be planted any time of
year, but the best time is Fall after the plant has gone dormant, which in
this area is usually during the months of November through January.
It is an interesting thing about camellias that they are one of the
few plants that bloom while they are “asleep” during their dormant period!
Planting a camellia during autumn, while
the plant is dormant, will permit its root system to develop during the cool
fall and winter months, thus permitting the plant to become more established
before hot weather arrives. If you
cannot plant in the Fall, then plant as early in the Spring as possible
before new growth begins. While not
the best time, it does enable you to purchase plants that have been
inspected in bloom and thus will assure you of getting the variety you want,
if variety matters. That being said,
camellias can be planted any time of year provided proper care and attention
is given, especially to watering during the warmer months.
Where to plant
Camellias can be planted almost anywhere,
but certain locations are better.
They can be planted in shade, even full shade, but they do better if they
get some sun. Some camellias will
tolerate even full sun, but the most ideal location is in semi-shade, such
as the high shade of tall pine trees.
It is best to avoid planting camellias under magnolias, oaks and other trees
with many surface roots because of the competition.
They can certainly be planted near a dwelling or wall, but if planted
in such locations they should be far enough away from the structure to
accommodate future growth. Camellias,
if left alone in a healthy environment, can eventually become small trees.
Before planting a camellia near any masonry structure, one should
take care to remove the soil if any concrete (lime) has been left behind
from construction. Camellias prefer
acid soil conditions, and lime has the opposite effect.
How to plant
This is perhaps the most important step of
all. The key to remember when
planting camellias is to PLANT HIGH.
If the plant is placed too low in the ground when planted, or if it later
settles to a point below the original ground level, it is doomed to a slow
lingering death while you are left wondering why.
It is better to plant far too high than one inch too low.
So plant camellias high, then mulch the plant to hold moisture and
protect any exposed roots.
The proper height for a new plant may be
dictated by your drainage conditions.
A common saying worth remembering is, “camellias can’t stand wet feet.”
Their roots literally breathe, and they need oxygen, which is why
camellia roots are generally found near the surface.
If they are allowed to remain standing in water the roots will
suffocate and die, or become so weak that the plant will do poorly.
This means that if you are in a very low-lying location or your site
is near the water table, it may be advisable to plant the camellia very high
and build the soil mixture around it.
As an illustration, camellia growers in low-lying places like Slidell,
Louisiana, often plant camellias almost on top of the ground, digging only a
shallow hole to promote stability and drainage.
The planting height all depends on what is necessary to provide good
drainage and keep the camellia roots from standing in water.
When the hole is dug, the root ball should
not be set in the hole until the soil beneath it has been firmly packed down
enough to prevent excessive settling below the original soil level.
Fill the remainder of the hole with a proper soil mixture and tamp it
down with your foot, sloping from the top of the root ball down to the edge
of the hole at the existing ground level.
Again this is to promote good drainage.
The “fifty dollar” hole
That old saying, “never put a fifty dollar
plant in a five dollar hole,” should always remind us how important it is to
give extra care and attention to creating a good home for a new or
transplanted camellia. If given a
good start at the time of planting, the camellia will be happy for a long
time, providing many years of beauty in your landscape.
The size of the planting hole should be
determined by the size of the root ball.
A rule of thumb is to make the hole at least twice as wide as the
root ball. If it is a small plant,
the hole should be three to four times as wide as the root ball.
If you are planting in a heavy clay location, the hole should be
deeper with perhaps rocks or pebbles in the bottom for better drainage.
A tip used by some camellia growers is to dig the hole and fill it
with water. If the water drains
completely after a few hours, it has adequate drainage.
If not, the camellia should be planted in a different location, or
planted extra high as described above.
Soil quality is one of the most important
things in planting camellias, which do best in rich organic soil that is
slightly acidic. These are the same
conditions that are best for azaleas and hydrangeas, which grow well in the
soils naturally found in the coastal south.
However, depending on the particular site, especially if it ever has
been excavated, the soil at the planting site may be unsuited for best
results. It thus is advisable to
plant camellias in a prepared soil mixture.
There are many good “planting mixes” available now at nurseries and
home centers, or you can mix your own.
All good mixtures contain copious amounts of organic material or
compost. Some of the best materials
include aged crushed pine bark, rotted oak leaves and peat moss.
These materials may be mixed with the top soil or sand from the
planting hole. Just remember that
camellia roots grow best in loose, well drained soil that is rich in organic
material.
Fertilizing camellias
As a general rule a camellia plant should
not be fertilized during the first year after it is set out.
The same is true for transplanted camellias.
Too much fertilizer at the beginning may seriously damage or even
kill the plant. The reason is that
Nitrogen in fertilizer stimulates leaf growth which makes the top grow
before the roots have gotten established well enough to support it.
Too many leaves, plus not enough roots, equals dead or weak plants.
But because root growth is very important at first, an
application of Triple Superphosphate at the time of planting will help.
Triple Superphosphate helps to stimulate root growth during the
important first year. This product
can be purchased at stores selling fertilizer.
After a camellia plant is established,
Spring is the best time to fertilize.
Watch the growth buds and plan your fertilizer application as close as
possible to the time you think the camellia will burst forth with new
growth. As a general rule of thumb,
camellias should receive a good balanced fertilizer in March and May.
A good slow release camellia-azalea fertilizer with trace elements is
recommended. Some growers also use
cotton seed meal, which is a good organic fertilizer that decomposes and
slowly releases its nitrogen. Around
late September the camellia should receive another treatment of good
fertilizer containing a nitrogen-free formula, approximately 0-14-14.
Mulching camellias
Camellias should be mulched and kept
mulched at all times and fresh mulch should be added each fall.
Mulch helps to keep the roots cool in summertime and maintain a moist
condition around the plants at all times.
It also prevents erosion and weed growth around a newly planted
camellia. Most mulch materials may be
used, but pine straw is the best. It
does not pack down (suffocating roots) or shed water as do many other
mulches. A three-inch layer of pine
straw, once or twice a year, is perfect.
Watering camellias
Proper watering is one of the most
important ingredients of good camellia culture. Established camellias are
pretty drought tolerant, but a newly planted camellia should be watered
regularly the first year and given a good soaking whenever the soil shows
signs of drying out. Soaking the
plant every few days is far better than frequent light watering.
However, bear in mind that camellias cannot stand wet feet, so never
drown it and be certain that your plant is provided proper drainage so that
its roots can remain moist but not standing in water.
The newly planted camellia should drain well (water should not puddle
around it more than a minute or two) and never be allowed to completely dry
out during the first year.
Pruning camellias
For established camellias, the process of
keeping them in shape by removing various parts is an activity that should
be undertaken only when necessary.
Camellias as a species are generally slow-growers compared to the faster
growing but less desirable non-flowering shrubs that are so commonly used in
many residential landscapes today.
Thus routine major pruning of camellias is generally unnecessary, and should
be undertaken only when they become leggy or too large for their location.
In no event should camellias be pruned with hedge shears, and
certainly no major pruning should occur after spring unless you don’t mind
removing the bloom buds for the next year.
A sort of natural pruning process occurs
when flower blooms are cut each year, and camellia owners are encouraged to
take plenty of branch when cutting blooms for indoor enjoyment, as the
longer branch often helps prolong a cut bloom when displayed in a vase, and
the plant itself benefits from the light pruning at that time of year.
If some of a plant’s branches are cut back every year in the ordinary
course of taking blooms, you will have a continuous supply of strong new
growth on which to produce the best flowers.
For serious camellia growers, annual
selective pruning may be advisable to remove weak limbs, or change its
shape, or improve airflow inside the bush for insect prevention. In any
event, the best time for pruning is during or immediately after bloom,
before new growth begins and before the warm humid months when camellias are
susceptible to a die-back fungus that kills plants.
If you want to play it safe when pruning,
sanitize your clippers between individual cuts or individual plants by
spraying them with a solution of a tablespoon of bleach in a half pint of
water in a trigger sprayer. Straight
rubbing alcohol is also used by some.
Where serious pruning or plant rejuvenation
is necessary, it is helpful to remember that camellias can take it.
They can be cut back as far as necessary, even to a stump, and will
regenerate into a beautiful plant. It
may take a year or two, however, before the plant resumes producing blooms.
But when it does, they will be better quality blooms than the leggy
old plant of yore. A good
fertilization in Spring will also help.
Also bear in mind that certain varieties
have different growth habits and may be slower returning.
For instance if you prune a 12-inch length from a young Daikagura (a
slow grower), it will take at least two years to grow back.
But other varieties such as Drama Girl can grow back in one season.
Controlling camellia pests
We don’t often consider Spring as a time to
think about pest control, but it really is.
When new growth awakens to the warmth of Spring sunshine, so do the
pests. The first one is aphids, which
don’t harm the leaves but disfigure them.
Likewise leaf-eating beetles emerge from winter with big appetites
that leave camellia foliage looking like Swiss cheese.
Spider mites and red spiders suck the leaves dry, leaving them
looking pale and anemic. But by far
the most frequently encountered pest in the humid Mobile Bay area is the
dreaded Tea Scale, sometimes called camellia scale.
These scaly bugs, which also plague hollies and some other broad leaf
shrubs, are known by the yellow mottling of leaves under which is found the
telltale white cottony substance that serves as the bugs’ tent shelter.
In most cases these pests can be controlled
with a paraffin wax mixture like “Ultra-fine,” a non-chemical spray product
available at most nurseries and home centers.
It essentially smothers the pests, and is applied with a pump or
backpack sprayer. Unlike “dormant
oil” it can be applied year round and is environmentally safe.
A general spray treatment in early spring and fall is recommended, or
whenever infestation appears. It is
essential that the spray treatment be applied to the hard-to-reach underside
of the leaves, which is where the bugs hide.
That makes the job a little messy around large camellias, but
spraying only the top surface of the leaves is not effective.
For treatment of beetles and other problem pests, it may be necessary
to add some pesticide to the spray mix, but this is recommended only as a
last resort. It is better to be safe
and environmentally friendly.
Conclusion
A properly planted camellia will grow and
bloom and brighten your winter landscape for many years, even generations,
to come. But remember this, there is
very little you can do later to correct any mistakes that were made at the
time of planting. We suggest you
plant well, and that you join with the members of the Camellia Club of
Mobile in learning about more ways to enjoy camellias.
— Camellia Club of Mobile
January 12, 2002
(This article is adapted in part from articles by Dr. Jerry Hogsette, “It’s Time to Get Out There and Do It,” Atlantic Coast Camellias (Fall 2001), and Hope Brown, “Basic Camellia Culture in North Carolina,” American Camellia Society Yearbook (1966).)
Page last modified 08/02/2012